security / Aug 10, 2026
How to Expose a Home Server Safely Without Opening Ports
Set up Cloudflare Tunnel, identity checks, and a narrow email allowlist without exposing a homelab port.
What you will build
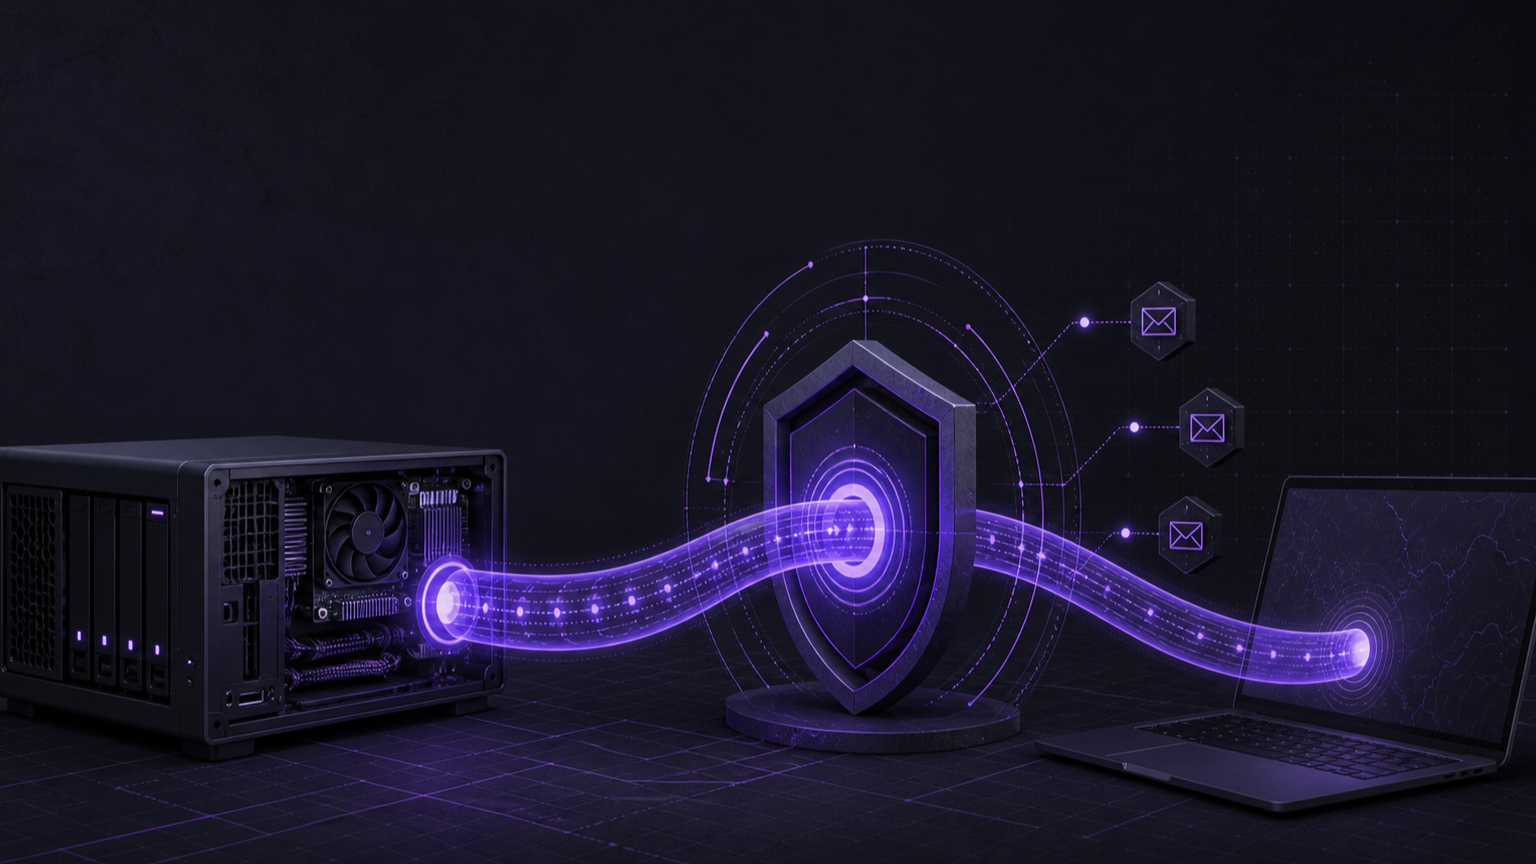
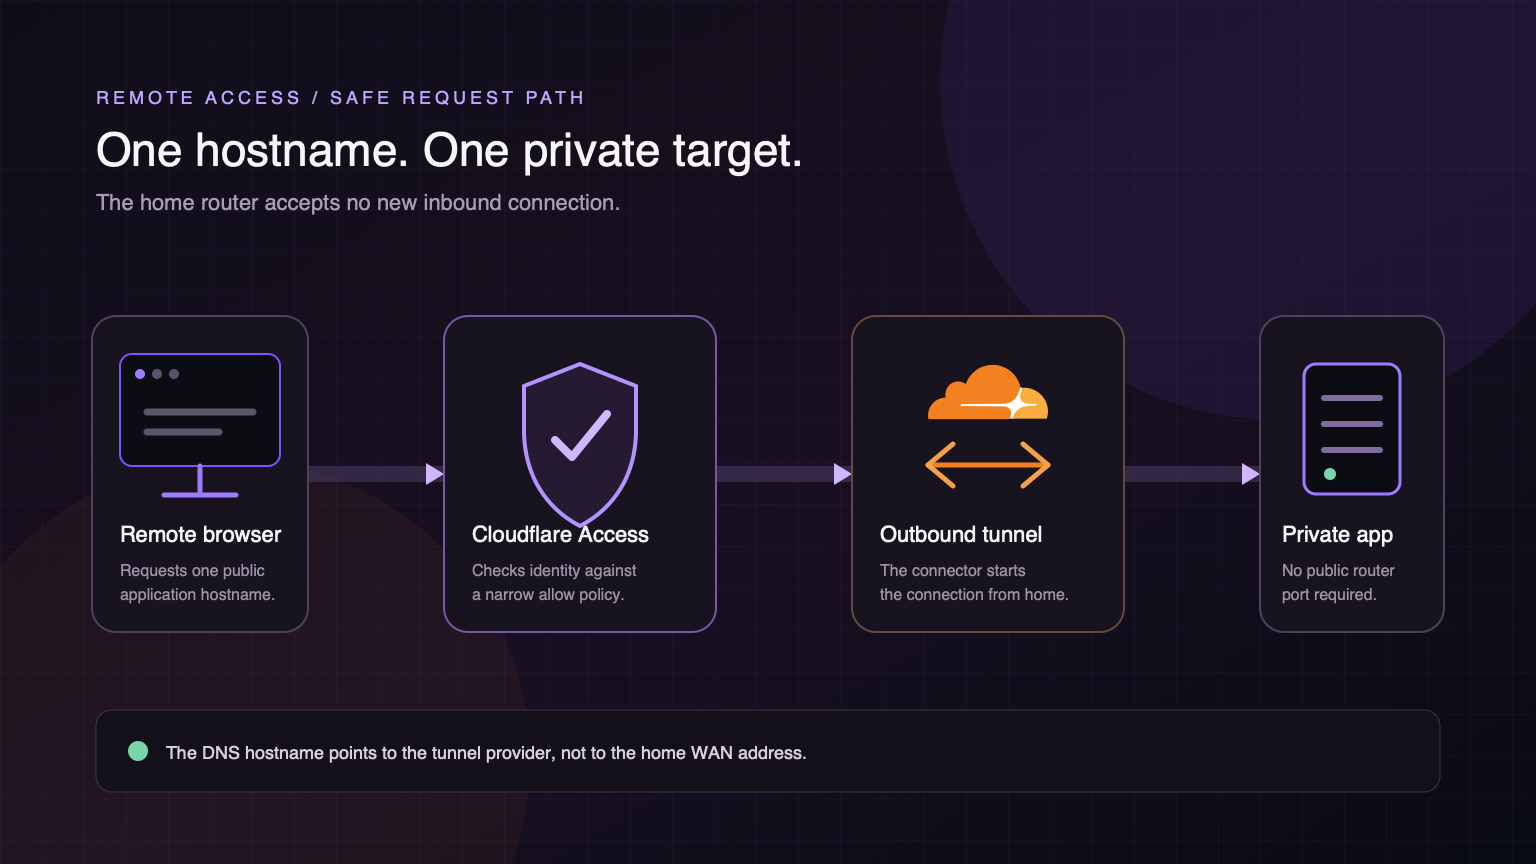
The goal is a single browser-based homelab service at a hostname such as requests.example.com. A remote request reaches Cloudflare first. Cloudflare checks the user's identity, then sends the approved request through an outbound tunnel to one private application. The home router accepts no new inbound connection, and the DNS record does not reveal the home WAN address.
This pattern suits dashboards, request portals, status pages, and other HTTP applications. It does not suit every client. Native Plex, television, mobile, and desktop applications may not complete an interactive Cloudflare Access sign-in. Keep those routes private, use the application's supported remote-access method, or use a VPN when the client cannot handle the identity flow.
Prerequisites before you start
Prepare the following items before changing DNS or the router:
- A domain in a Cloudflare zone.
- Permission to create a Cloudflare Tunnel, DNS record, Access application, and Access policy.
- A machine or container host that stays online and can reach the private application.
- The application's private target, such as
http://sonarr:8989orhttp://192.168.1.40:5055. - One public hostname for that application.
- The exact email addresses that should receive access.
- A separate local route for recovery if Cloudflare or the connector is unavailable.
Confirm that the future connector host can reach the private target now. Open the target from that host or use a local health check. Fix local DNS, firewall, container networking, or application binding before adding the public route. A healthy public hostname cannot compensate for an unreachable private target.
Choose a low-risk browser application for the first route. Do not begin with a router admin page, hypervisor console, storage control panel, Docker socket, database, or unauthenticated API. CISA's guidance targets government systems, but its core point applies here: powerful management interfaces should not be directly reachable from the public internet.
Create the outbound tunnel
Cloudflare Tunnel uses cloudflared to open outbound connections from the private network to Cloudflare. No inbound router rule is required.
- Open the Cloudflare Zero Trust dashboard.
- Go to Networks → Connectors → Cloudflare Tunnels.
- Select Create a tunnel and choose Cloudflared.
- Give the tunnel a stable name that describes the site, not one application.
- Choose the connector environment and copy the generated install or run command.
- Run that command only on the private connector host.
- Return to Cloudflare and wait for the connector to report a healthy state.
Treat the connector token as a secret. Do not commit the generated command, paste it into an article, or leave it in shared shell history. If the token appears in a public place, rotate the connector credential before continuing.
Run at least two connector replicas when remote availability matters. Place replicas on hosts that can reach the same private targets. A second connector improves tunnel availability, but it does not create a backup for the application itself.
Create the identity gate first
Create the Access application before publishing the hostname. This order prevents a new hostname from briefly existing without the intended identity rule.
- Open Access controls → Applications in Cloudflare Zero Trust.
- Select Add an application.
- Choose Self-hosted.
- Enter an application name and the exact public hostname.
- Add an Allow policy.
- Set the selector to the specific approved email addresses.
- Choose the identity provider or one-time PIN method.
- Save the application.
Cloudflare Access applications deny unmatched users by default. A user must match an Allow policy to continue. Avoid broad rules such as allowing every valid email address. Avoid Bypass rules on a private application because Bypass skips the normal Access security controls.
Use separate Access applications when services have different audiences. A family request portal and an administrator dashboard should not inherit the same policy only because they share a tunnel.
Add one public hostname
The public hostname maps to one private target. Keep this mapping narrow and explicit.
- Open the tunnel in Cloudflare.
- Add a public hostname.
- Select the domain and enter the application subdomain.
- Choose the HTTP or HTTPS service type that matches the private application.
- Enter the private target, including its port.
- Enable Protect with Access when Cloudflare offers token validation for the route.
- Save the hostname.
If the app is managed by Stackarr, open Settings → Remote access first and enter the scoped Cloudflare token, account ID, zone ID, tunnel name, and email allowlist. Then open Apps → Settings → Open and connect, enter the hostname, keep Require Cloudflare Access enabled, and select Add route. The Cloudflare integration guide lists every field, permission, verification check, and rollback action. The resulting architecture is the same as the manual process above.
Do not point a normal DNS record at the home WAN address. The tunnel route should create or use the Cloudflare-managed hostname. Do not add a router port forward for the same service.
Remove direct paths to the origin
After the tunnel route works for an approved user, remove the old inbound path.
- Delete the application's port-forwarding rule from the home router.
- Remove any matching UPnP mapping.
- Confirm that the application listens only where the connector or private network can reach it.
- Keep the application's own password, session, and multi-factor controls enabled.
- Restrict host and container firewalls to the private source networks that need the service.
- Confirm that the public DNS answer does not disclose the home WAN address.
A tunnel does not protect an origin that remains available through a second route. Test the old port from a mobile connection or another external network. If it still answers, inspect router rules, UPnP, IPv6 firewall rules, reverse proxies, and any previous dynamic DNS record.
For highly privileged management interfaces, stop here and keep them private. Use a device-aware VPN or private overlay network instead of a public application route.
Verify all four paths
A successful approved login proves only that one path works. A complete check also proves that unwanted paths fail.
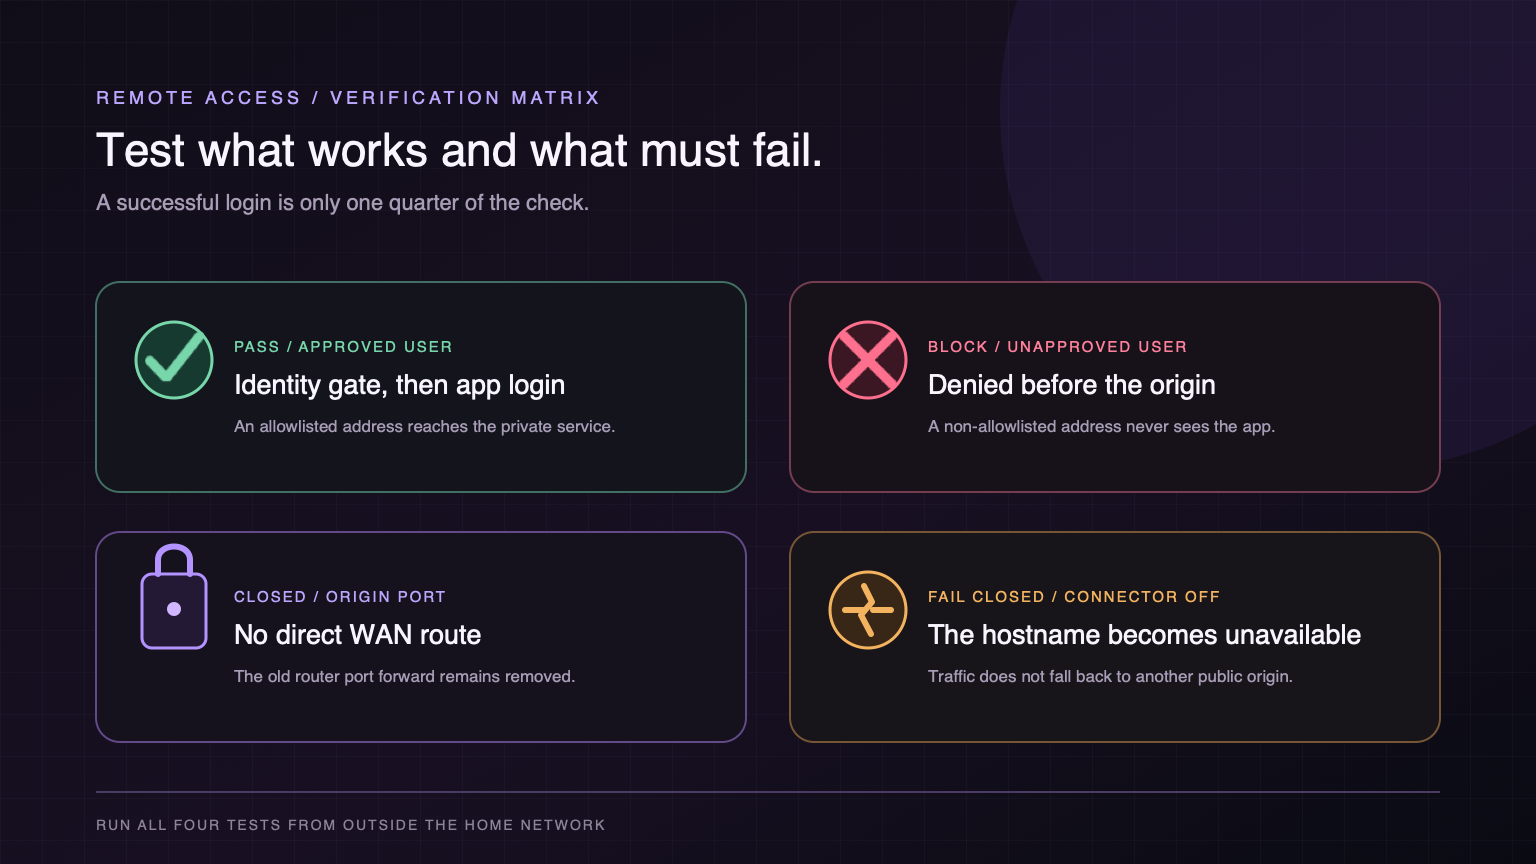
- Approved user: Open the hostname in a private browser window from outside the home network. Complete the Access sign-in with an allowlisted address. Confirm that the application's own login appears and the application works.
- Unapproved user: Repeat the test with an address outside the allowlist. Confirm that Cloudflare denies the request before the application loads.
- Direct origin: Test the old public port and previous hostname. Confirm that neither path reaches the application.
- Connector stopped: Stop the connector briefly. Confirm that the public hostname becomes unavailable and does not fall back to another public origin. Restore the connector and confirm recovery.
Review Cloudflare Access and tunnel logs after the test. Look for unexpected identities, repeated denied requests, and a private target that changes between connector replicas. Record the hostname, private target, Access application, policy owner, and review date with the rest of the homelab configuration.
Repeat these checks after changing the router, application port, container network, identity provider, email allowlist, domain, or tunnel connector.
Troubleshoot and roll back safely
If the hostname returns a gateway error, check connector health and private target reachability before changing DNS. The connector must resolve the target name and reach the target port from its own network namespace.
If approved users loop at sign-in, verify that the Access application contains the exact hostname. Check policy order, the selected identity provider, and the approved email spelling. Remove stale browser cookies only after confirming the policy.
If a native client stops working, test the same hostname in a browser. A successful browser test and failed native-client test usually indicates that the client cannot complete the Access flow. Remove that public route or move it behind a VPN. Do not disable identity checks for an administrative application simply to accommodate an incompatible client.
If an unapproved user reaches the application, remove the public hostname immediately. Then correct the Access application and policy while the origin remains private.
To roll back the complete setup:
- Remove or disable the public hostname route.
- Confirm from an external network that the hostname no longer reaches the application.
- Remove the Cloudflare Access application if no other route uses it.
- Stop and remove the connector only when no other hostname uses the tunnel.
- Keep the application available on its trusted local address.
Do not restore a permanent router port forward as the shortcut. Correct the tunnel, private target, or identity rule while the origin stays off the public edge.
Verification ledger